

Winter colour forever
Brightening Up Winter: The Perfect Pots with Splendid Plants
Hey there green thumbs,
Despite the chill in the air that makes us want to bury ourselves under cosy quilts, winter can, in fact, be a charming season for gardening too! This blog post is here to guide you on creating the perfect winter pot featuring some frost-resistant champions.
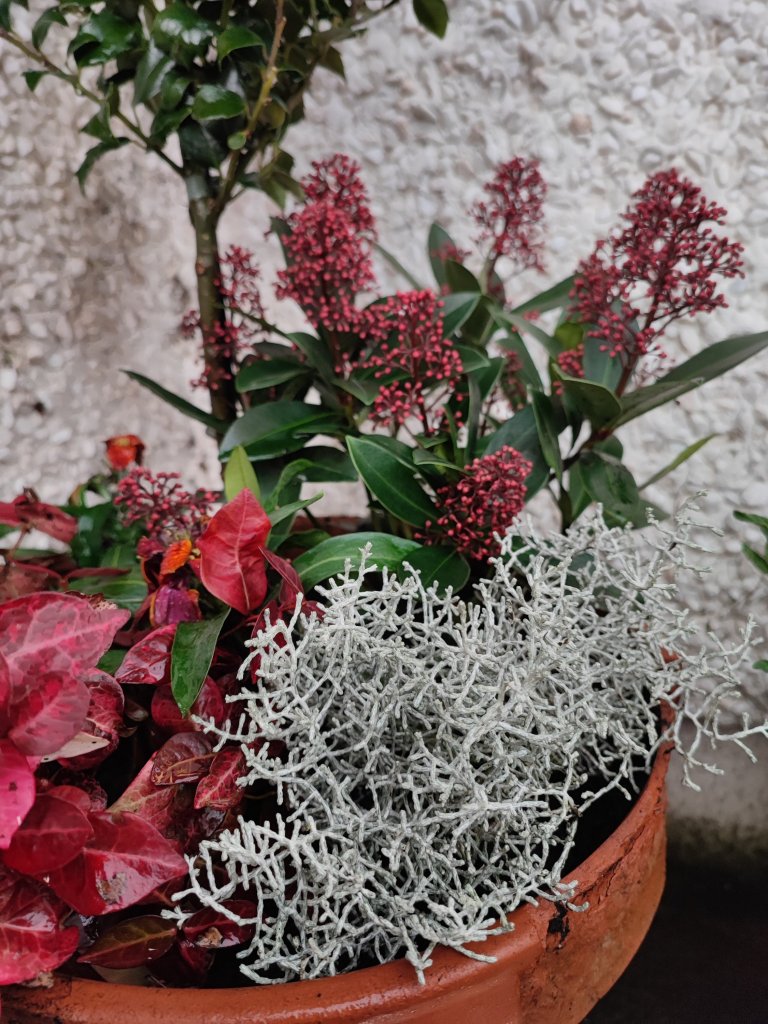
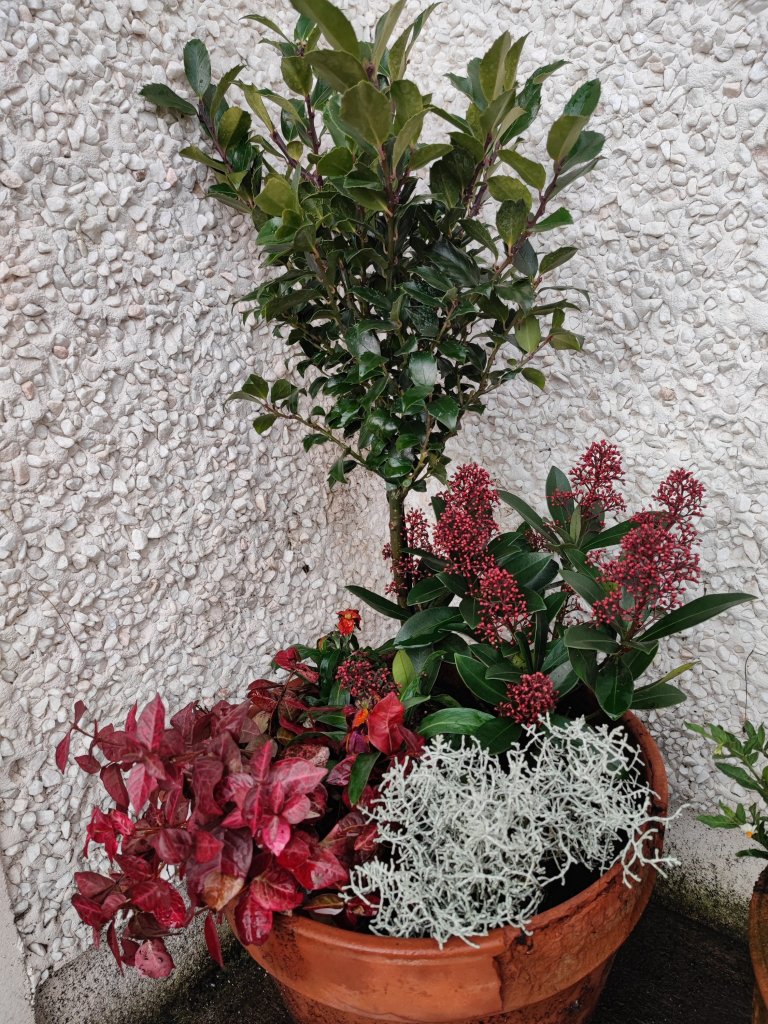
We’re working with: Ilex ‘Ilex Maid’, Trachelospermum jasminoides ‘Cameleon’, Skimmia japonica ‘Rubella’, Calocephalus brownii, and Erysimum cheiri ‘Sugar Rush’. While these names might sound like tongue twisters, trust me, their beauty and resilience to winter frost are worth their tongue-twisting monikers.
Let’s get our hands dirty!
1. Preparing the Pot
Start by choosing a pot that’s a minimum of 30 cm or 12 inches in diameter. The aim is to give these plants some room for growth. Make sure your pot has good drainage to prevent any water logging in the cold months.

2. Plant Arrangement
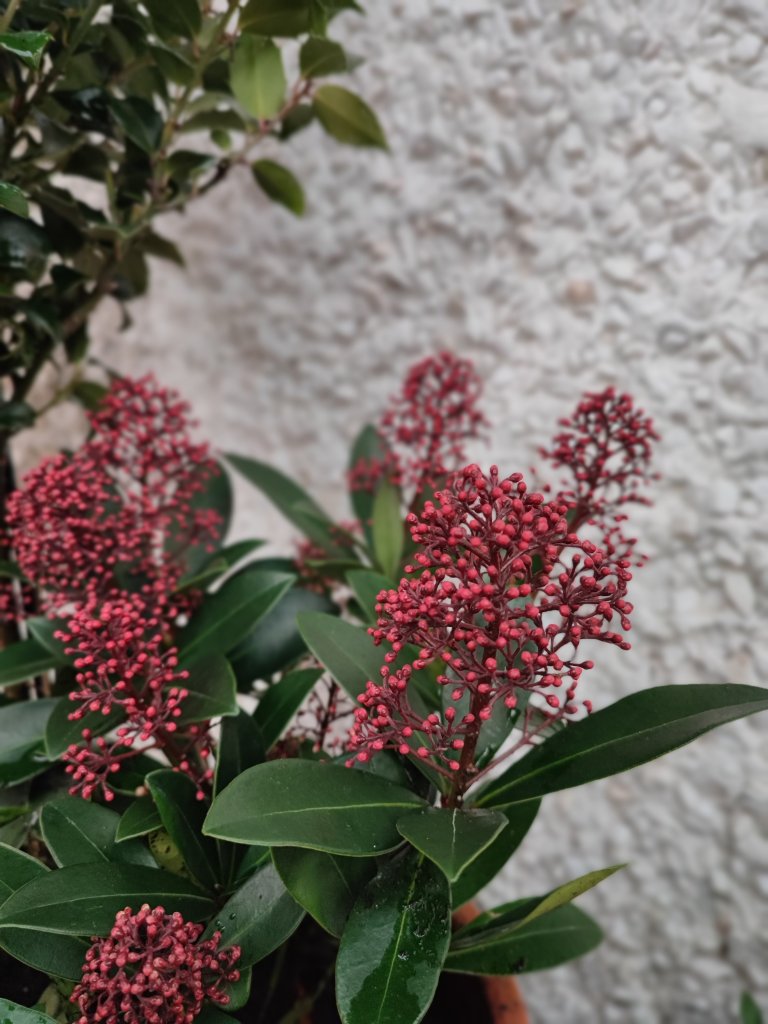
Our first plant, the Ilex ‘Ilex Maid’, will act as the ‘focus’ in our pot. This holly plant will provide height and structure to the combination. It was berried when I first planted it, but the birds ate them all during a week of cold weather!
The Skimmia japonica ‘Rubella’, and Erysimum cheiri ‘Sugar Rush’ will act as the ‘fillers’. These evergreens provide lush and colourful foliage which gives our pot its body.
Finally, Calocephalus brownii, the silver bush, and Trachelospermum jasminoides ‘Cameleon’, function as the ‘spillers’. With their colourful foliage they will spill over the edge of the pot, providing a contrast against the vibrant greens and dark tones of the other plants.
3. Planting
I started by placing the Ilex ‘Ilex Maid’ at the back of the pot. Now, surround it with your trio of fillers: Trachelospermum, Skimmia, and Erysimum (I included two). Pack them close to each other around the Ilex, adjusting as needed for balance.
Lastly, the final spiller (Calocephalus) near the edge of the pot. It will grow and cascade over the sides, providing an aesthetically pleasing frame. It’s essential to remember to plant the roots of each plant in soil no deeper than the level they were growing at in their initial pots.
4. Aftercare
Our newly planted pot will require watering only occasionally in winter, maybe once a week throughout spring, especially during dry spells. The aim is not to let the soil dry out completely but also not to overwater and risk root rot.


Winter Plants Forever
Now, here’s the fantastic part! Not only do these plants provide a delightful winter spectacle, but when the seasons shift and it’s time to redo your pots for the summer, these plants can be planted out in the garden. Getting the most out of your plants? Yes, please!
So there you have it, friends! The perfect winter pot. Through this enjoyable process, I hope you’ve learned that even in the bleak winter, our pots can be a riot of colour. Warm gloves, warm tea, and we’re ready to garden!
Remember, every day is a wonderful day to get your hands dirty. Happy planting!
Cheers,
Ciaran

